Showing posts with label sewing. Show all posts

Tuesday, August 26, 2014

Kimono Construction

Hello,

First off, I apologize for not getting the progress pictures up last night, I was busy sewing the body of the kimono together.  I have not attached the front panels or the sleeves yet.  I will be attaching the front panels tonight, and the sleeves will be attached after the embroidery is finished. 

The reason for delaying the attachment of the sleeves is simple - as I am making a lined kimono, the opening under the sleeve of the kimono - the Miyatsukuchi (身八つ口  - is attached not only to the body of the kimono, but also to the lining, so that no seams are showing.  The kise also helps with this, but more on that later in this post.  When doing sashiko embroidery, it is necessary to leave slack on the back of the embroidery, and also, as the kimono will be washable, I will need to knot the thread on the back of the embroidery as well.  (There is a way to start sashiko without a knot, but from what I have read, it does not hold up well to multiple washes.)  It would make it much more difficult to embroider, leave slack, and make the knots, if the lining were attached to the kimono, even if it were just attached  the miyatsukuchi and not at the hem or collar.  Also, I am still unsure if I want to embroider on the sleeves or not, and, if I were going to attach the sleeves, I would first have to completely attach the lining to them, which would not work for the reasons listed above.

Something that I am trying to do correctly, and I think I have it mostly figured out, is kise.  I have not found a satisfactory definition of kise anywhere, so I am going to try to do it justice here.  Kise is a way of pressing your seams so that the seams are always covered by approximately 0.2cm of fabric from one side or the other.  I am not sure if it is traditional, but I have found that using silk pins while ironing the kise helps me keep it more uniform.  I am pretty sure I would have burns all over my fingers if I did not use pins.

The way that I have been making kise on this kimono is working for me, so I will try to lay it out and explain it.  I forgot to take pictures of the kise that I made yesterday, for the two back seams, but I will (hopefully) remember to take some tonight when I attach the front strips.  I need to make kise on the sides of the kimono as well, so that is four opportunities to do step by step pictures.  If I do get them, I will make a tutorial on kise and post it for everyone.

Kise

1.  Sew your seam.  I have found that I sew much better when I measure and mark the seam with a quilting pencil and ruler.  Kimono are great for marking seams, because they are all straight lines and no curves!

2.  With the right sides of the fabric still together - before you open the fabric - lay the raw edges towards you so that the seam is furthest away from you, at the top of the fabric.  (If a different orientation works better for you, use it!  This is a personal preference of where the seam is on the fabric.)

3.  Fold the seam back towards you so there is just about an eighth of an inch of fabric left on the other side of the seam.  The raw edges of the seam will be facing you.  Pin in place. (This I do have a picture of!)


4.  Press firmly along the folded edge to crease the fabric.

5.  Gently open up the fabric so that one side stays folded a bit over the seam. 

After I mark and sew on the front panels, I will be experimenting with different embroidery patterns by tracing them to tracing paper and will hopefully decide on one so that I can start tracing it onto the kimono body.  The design will have to be traced onto the outside of the kimono, and I am anticipating that it will be a bit tricky to line up the seams and such.  Luckily I am in possession of Scotch Tape so that I can tape multiple sheets of tracing paper together.  I am only going to tape them together vertically, because if I tape them together horizontally, I will have difficulty with raising them a bit to trace the line of the embroidery onto the fabric.  I am having difficulty getting my hands on some dressmaker's carbon paper, which would make this a whole lot easier, so I am under-tracing the designs with a yellow quilter's pencil.  I have found that the easiest way to do this is to leave the tracing paper close to the fabric, put the tip of the pencil at the start of the line, and use my left thumb (as I am right handed) to guide the pencil along the line as I am under-tracing. 

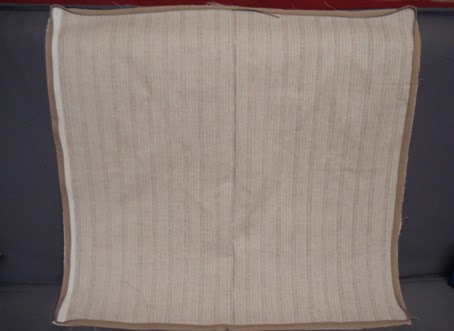
On a side note, I have discovered that the kimono fabric photographs dramatically different depending if I use flash or not.  The picture above I used flash for, and it is a nice deep purple.  When I don't use flash, however, I get a much brighter color that is almost raspberry.

To be quite honest, I am not sure which one I like better.

For the embroidery, I will be using a winter white.  This is subject to change - I may just take my kimono and go into the embroidery section and lay out a bunch of different colors on it to see which one I like best.  I would ideally like to find a green that works with the kimono and lining.  The lining is a nice bright yellow green that will stand out very nicely, and the han-juban - which is a bit like a wrap skirt that goes under the kimono so that people don't get flashed - is a bright green.  I dyed the lining and the fabric for the han-juban together, they just took the dye very differently, which is a bit frusturating, as I like the color of the han-juban much more.  If, once I am done with the embroidery, I decide the colors of the lining don't match well, I may try to re-dye it a deeper green.  Unfortunately I am not quite sure what happened to that dye, so I may have to order more.  I am hoping that I will be satisfied with the colors together and not have to re-dye though, that would be great.

And lastly, I would like to introduce you to my nemesis...
Sorry that the picture is a bit fuzzy, she does not like laying still.  This is Itoshii, one of two cats that we own.  As you can see, she has long hair and thinks she owns my ironing board.  That is what the lint roller in the picture is for - every time I need to use it, I kick her off and lint roller it to keep from getting cat hair and dander all over everything.  Unfortunately, she has decided that the table is her space and that I have to pay in pets to use it, which is frustrating when she decides to lay on my fabric while I am trying to mark it.  She also loves to try to eat my marking pencil as I am drawing lines with it.  Lucky for her she is adorable and purrs oh so loud while being naughty so Mommy doesn't get too mad at her.

I will hopefully have a tutorial (with pictures) of how I make a kise tomorrow.

Thanks for stopping by!

Kristin


Friday, October 18, 2013

More Progress

First of all, a few years ago, Samantha and I did a geisha makeover at Metrocon.  Here is one of my favorite pictures from it.  I am wearing the blue kimono, as the big sister, and Samantha is wearing the pink kimono.


Next - this weekend will be jam packed.

I was working on my stretcher frame, trying to get the pins bend so that they would create the hooks, and I realized that the pins I had bought specifically for this were way to small.  Luckily, I had some other pins that I could use, but then I couldn't find needle nose pliers.  That was solved when I found a pair of bent tweezers that I used to bend the pins, and I managed to bend about half of them.  So tonight I plan to finish bending all the pins and then, tomorrow, I am going to paint the kimono shell and sew the obi, as I finally bought my obi stiffener.

Also, I bought the fabric for the tatoushi, so I will try and get that done tonight as well.

On Sunday, I will be washing out my fabric, and then, during the week, I will be locking myself in my sewing room trying to get the kimono sewn.  I also need to sew the han-juban, but that will be very easy.

I have decided to not paint on the obi, as, if it is folded in half, I do not want the paint to rub off on the kimono.

My goal is to have the kimono done by mid-afternoon on next Saturday, the 26th, so that Samantha can come over and try it on.  It needs to be by mid-afternoon because I am having a chili cook-off with my mom and my sister's family in the evening.

I will have to work very hard, but I believe that I can get everything done.

Wish me luck!

Kristin

Friday, September 20, 2013

Gradient Blue Satin Haori

So I was feeling rather stressed last night, and as a result didn't feel like doing much except sleeping, and my wonderful husband suggested that I do "sewey stuff."  I reluctantly ventured into my sewing room despite the fact that I would have preferred to just go to sleep for the night, which my husband (quite understandably) vetoed because it was 6:15pm.

When I got to my sewing room, right on top of my tub of fabric, was this lightweight, sheer if you hold it up to the light, blue bamboo patterned, polyester fabric that would look fantastic as the lining in a haori. This got my creative juices flowing and I dug through my stash and came up with a blue gradient dyed piece of middle weight satin that would pair wonderfully with the bamboo fabric for the haori shell.

I had never made a haori before, but I have used the now out of print Simplicity pattern for a kimono that comes with a haori pattern as well, but that pattern requires that you fold about a foot of the shell fabric on the front and back up into the lining of the haori, which, while it is the correct way to do it, I did not have enough of the satin to accomplish this.  With this in mind, I went on a haori pattern hunt on the internet and came up with a sad lack of tutorials that contained measurements, so I reviewed what I knew of haoris and their construction.

1 - Haori are made on the same size weaving frames as full-length kimono, approximately 12" wide.

2 - In order to accommodate for a variety of sizing, I usually make my kimono panels 14" wide.

3 - Haori usually hang to right about the top of the wearer's hip.

With these three things in mind, I hung the satin over my shoulder to see which way the gradient should go.  I really wanted the gradient to go from side to side, and, when I hung it over my shoulder, it hit right below my hip, which is good as I am only 5'4".

I folded the fabric in half, wrong side out, with the light side on the right and the darker side on the left, and then pulled out some 14" wide parchment paper and a white marking pencil and sectioned the light side off into two 14" sections, but when I went to the darker side, I realized that if I did four 14" sections, I would not have enough to make the collar as well.  Making a quick decision, I decided that body width was more important than sleeve width and shortened the sleeve width to 12".  I then used my quilting ruler to mark the sleeves 16" long and cut out all my piece of the shell.

Cutting out the lining was trickier as the fabric is very light, and the bulk kept falling off my cutting table, but I persevered and cut out the two sleeves and body pieces by pinning the shell pieces to the lining and then cutting them out.  I also managed to cut the sleeve pieces so that a line of bamboo was close to the edge, and that will be oriented to the open area of the haori sleeve.

Last, I found a matching color thread, wound my bobbin and started overlocking my raw edges on the satin.  Much to my chagrin, my upper thread kept breaking even after I adjusted the tension so I pulled out my bobbin and realized that the thread at the beginning of the bobbin had gotten pulled into the bobbin while I was winding it.  That bobbin got unwound and then rewound with new thread and I started up my machine with much less thread breakage.

Tonight, I have the rest of the satin (one body panel, one sleeve, and the collar) to overlock and then the lining to overlock to prevent fraying.  Then I get to sew the body, lining, and sleeves, figure out what I am making the tie on the front out of, sew the tie to the body, and then sew the collar on.

Then I get to find a model, or figure out if I want to model it myself, take and edit pictures, and put up my first item in my shop.

For the pictures, I am debating whether I want pictures of the haori with kimono, pictures of it with modern clothes, or a mixture of both.  I am leaning toward a mixture of both.

I am super excited that I will finally have a listing, and, hopefully, a sale within a few weeks!

Of course, in order to post the item, I have to have my shop go live, which means completing an About Page, Policies Page, figure out shipping costs, and deciding what I want to price the haori at.

But still...it will be my first listing!

YAY!

Kristin ^_^

Tuesday, September 17, 2013

Fabric Tatoushi Tutorial

So I was recently searching for a great fabric tatoushi / tatoshi tutorial that I had found several years ago and was aghast when I could not find the site (http://bangasakimono.blogspot.com/2010/01/fabric-tatoushi-tutorial.html) 

However, I managed to find a word document of the tutorial so I decided to post it for anyone who can benefit from it.  

I hope that someone can benefit from this.

Kristin ^_^

I did not create this tutorial.  I am just reposting it.


Fabric tatoushi

I've always wanted to make my own tatoushi , the traditional paper ones I find are usually quite fragile. The ones I own have over the years ripped or the ties have come off from the paper. This is one the reasons why I decided to make them out of fabric and to add a zip.
The fabric tatoushi are fairly easy to make, it uses a metre of fabric and you can use any type of fabric, though cotton will be the most easiest to use. Traditional tatoushi uses cotton ties to keep them closed, I have chosen to use a zip to fasten my tatoushi, It allows for easy access.
The zip I use is called a continous/chain zip, this is a zip which comes off a roll and you can cut it to your desired length, these should come with silders which allow you to zip and unzip.
The bias tape I use is cotton as I find it easier to sew then satin, you can find all of these supplys from your local haberdasery or ebay.
In this tutorial I have added the option of adding flaps to the tatoushi, this stops the kimono from being caught in the zip as you open and close it. This is entirely optional.

Materials:
1 metre of fabric
19mm cotton bias tape (L) 180cm x2, (M) 155cm x2, (S) 145cm x2
Continous Zip (L) 180cm, (M) 155cm, (S) 145cm
1 Zip Silder


Tools:
Sewing Machine
Iron
Scissors
Pins

Layout


Decide what size you want your tatoushi to be and cut out the pieces as shown in the diagram above. Also cut your zip and bias tape to the appropriate length. In the photos I'm making a large sized tatoushi.

1: First fold your body piece fabric in half (check diagram) and iron in a fold.
2: Serge the edges of your flap pieces or sew a zigzag stitch around the edges.


2: Split your zipper in half, so now you have the zipper in 2 pieces. On one of the zipper pieces, cut away 2.5cm of the fabric tape. Not the teeth!


3: Place the flap pieces to the body and pin 2.5cm away from the ends, check photos.


Then pin one side of the zipper on top of the flap piece. Make sure the zipper teeth are facing inward and is the right side up. (check photo)


4: Using your zigzag foot as a guide, sew the zipper and flap onto the body.


6: When you get to the corner, stop sewing 3mm from the end and leave the needle in the down postion.

Turn the fabric and the zip 90 degrees and continue sewing.

Continue sew all the way round the edge till you get to the fold line. Backstitch and leave the excess zip for now.
7: Repeat for the other side. It should look like this when your done.


8: Now sew the bias tape around the edges, just like the zip. Your goal is to hide and encase the raw seams, it should look like this when your done.


9: Now you need to use the zip silder to join the two zipper parts together. Here is a video to show you how.
It should look like this.


10: From the folded edge, sew 7cm in. Do the same for the other end.


And your finished.


This is my 1st time writing a tutorial, so if you have any problems, let me know. Also if you make one let me know how you got on. Thanks.