However, I managed to find a word document of the tutorial so I decided to post it for anyone who can benefit from it.
I hope that someone can benefit from this.
Kristin ^_^
I did not create this tutorial. I am just reposting it.
Fabric tatoushi
I've always wanted to make my own tatoushi , the traditional
paper ones I find are usually quite fragile. The ones I own have over the years
ripped or the ties have come off from the paper. This is one the reasons why I
decided to make them out of fabric and to add a zip.
The fabric tatoushi are fairly easy to make, it uses
a metre of fabric and you can use any type of fabric, though cotton will
be the most easiest to use. Traditional tatoushi uses cotton ties to keep them
closed, I have chosen to use a zip to fasten my tatoushi, It allows for easy
access.
The zip I use is called a continous/chain zip, this is a zip
which comes off a roll and you can cut it to your desired length, these should
come with silders which allow you to zip and unzip.
The bias tape I use is cotton as I find it easier to sew
then satin, you can find all of these supplys from your local haberdasery or ebay.
In this tutorial I have added the option of adding flaps to
the tatoushi, this stops the kimono from being caught in the zip as you open
and close it. This is entirely optional.
Materials:
1 metre of fabric
19mm cotton bias tape (L) 180cm x2, (M) 155cm x2, (S)
145cm x2
Continous Zip (L) 180cm, (M) 155cm, (S) 145cm
1 Zip Silder

Tools:
Sewing Machine
Iron
Scissors
Pins
Pins
Layout

Decide what size you want your tatoushi to be and cut out
the pieces as shown in the diagram above. Also cut your zip and bias tape to
the appropriate length. In the photos I'm making a large sized tatoushi.
1: First fold your body piece fabric in half (check diagram)
and iron in a fold.
2: Serge the edges of your flap pieces or sew a zigzag
stitch around the edges.

2: Split your zipper in half, so now you have the zipper in
2 pieces. On one of the zipper pieces, cut away 2.5cm of the fabric tape. Not
the teeth!

3: Place the flap pieces to the body and pin
2.5cm away from the ends, check photos.


Then pin one side of the zipper on top of the flap piece.
Make sure the zipper teeth are facing inward and is the right
side up. (check photo)


4: Using your zigzag foot as a guide, sew the
zipper and flap onto the body.

6: When you get to the corner, stop sewing 3mm from the
end and leave the needle in the down postion.

Turn the fabric and the zip 90 degrees and
continue sewing.

Continue sew all the way round the edge till you get to the
fold line. Backstitch and leave the excess zip for now.
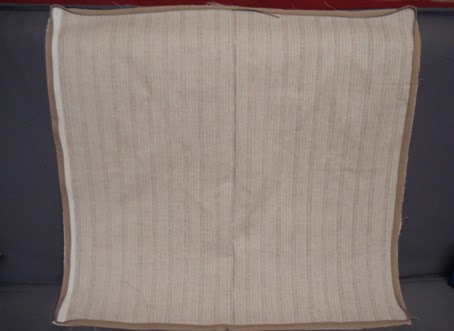
7: Repeat for the other side. It should look like this when
your done.
8: Now sew the bias tape around the edges, just like the
zip. Your goal is to hide and encase the raw seams, it should look like this
when your done.

9: Now you need to use the zip silder to join the two zipper
parts together. Here is a video to show you how.
It should look like this.

10: From the folded edge, sew 7cm in. Do the same for the
other end.

And your finished.


This is my 1st time writing a tutorial, so if you have any
problems, let me know. Also if you make one let me know how you got on. Thanks.
Just found this tutorial a few months ago (2021), and it has been SOOOO helpful! Thank you!
ReplyDelete